Your First Bot
This tutorial aims to give you a short overview of creating bots in Piecewise and how the system works.
1. Get Piecewise
If you don’t have Piecewise already, you’ll need it for this tutorial. You can purchase Piecewise or download Piecewise’s demo on Steam (and itch.io, soon). Once you have a copy, download it and open it.
For the sake of brevity, this tutorial will focus on the Discord platform, so if you want to follow along, you’ll need an account. However, most of the steps in this guide are relevant to all platforms Piecewise supports.
2. Familiarizing yourself with the interface
The main window
Opening Piecewise yields a window that looks similar to the following:
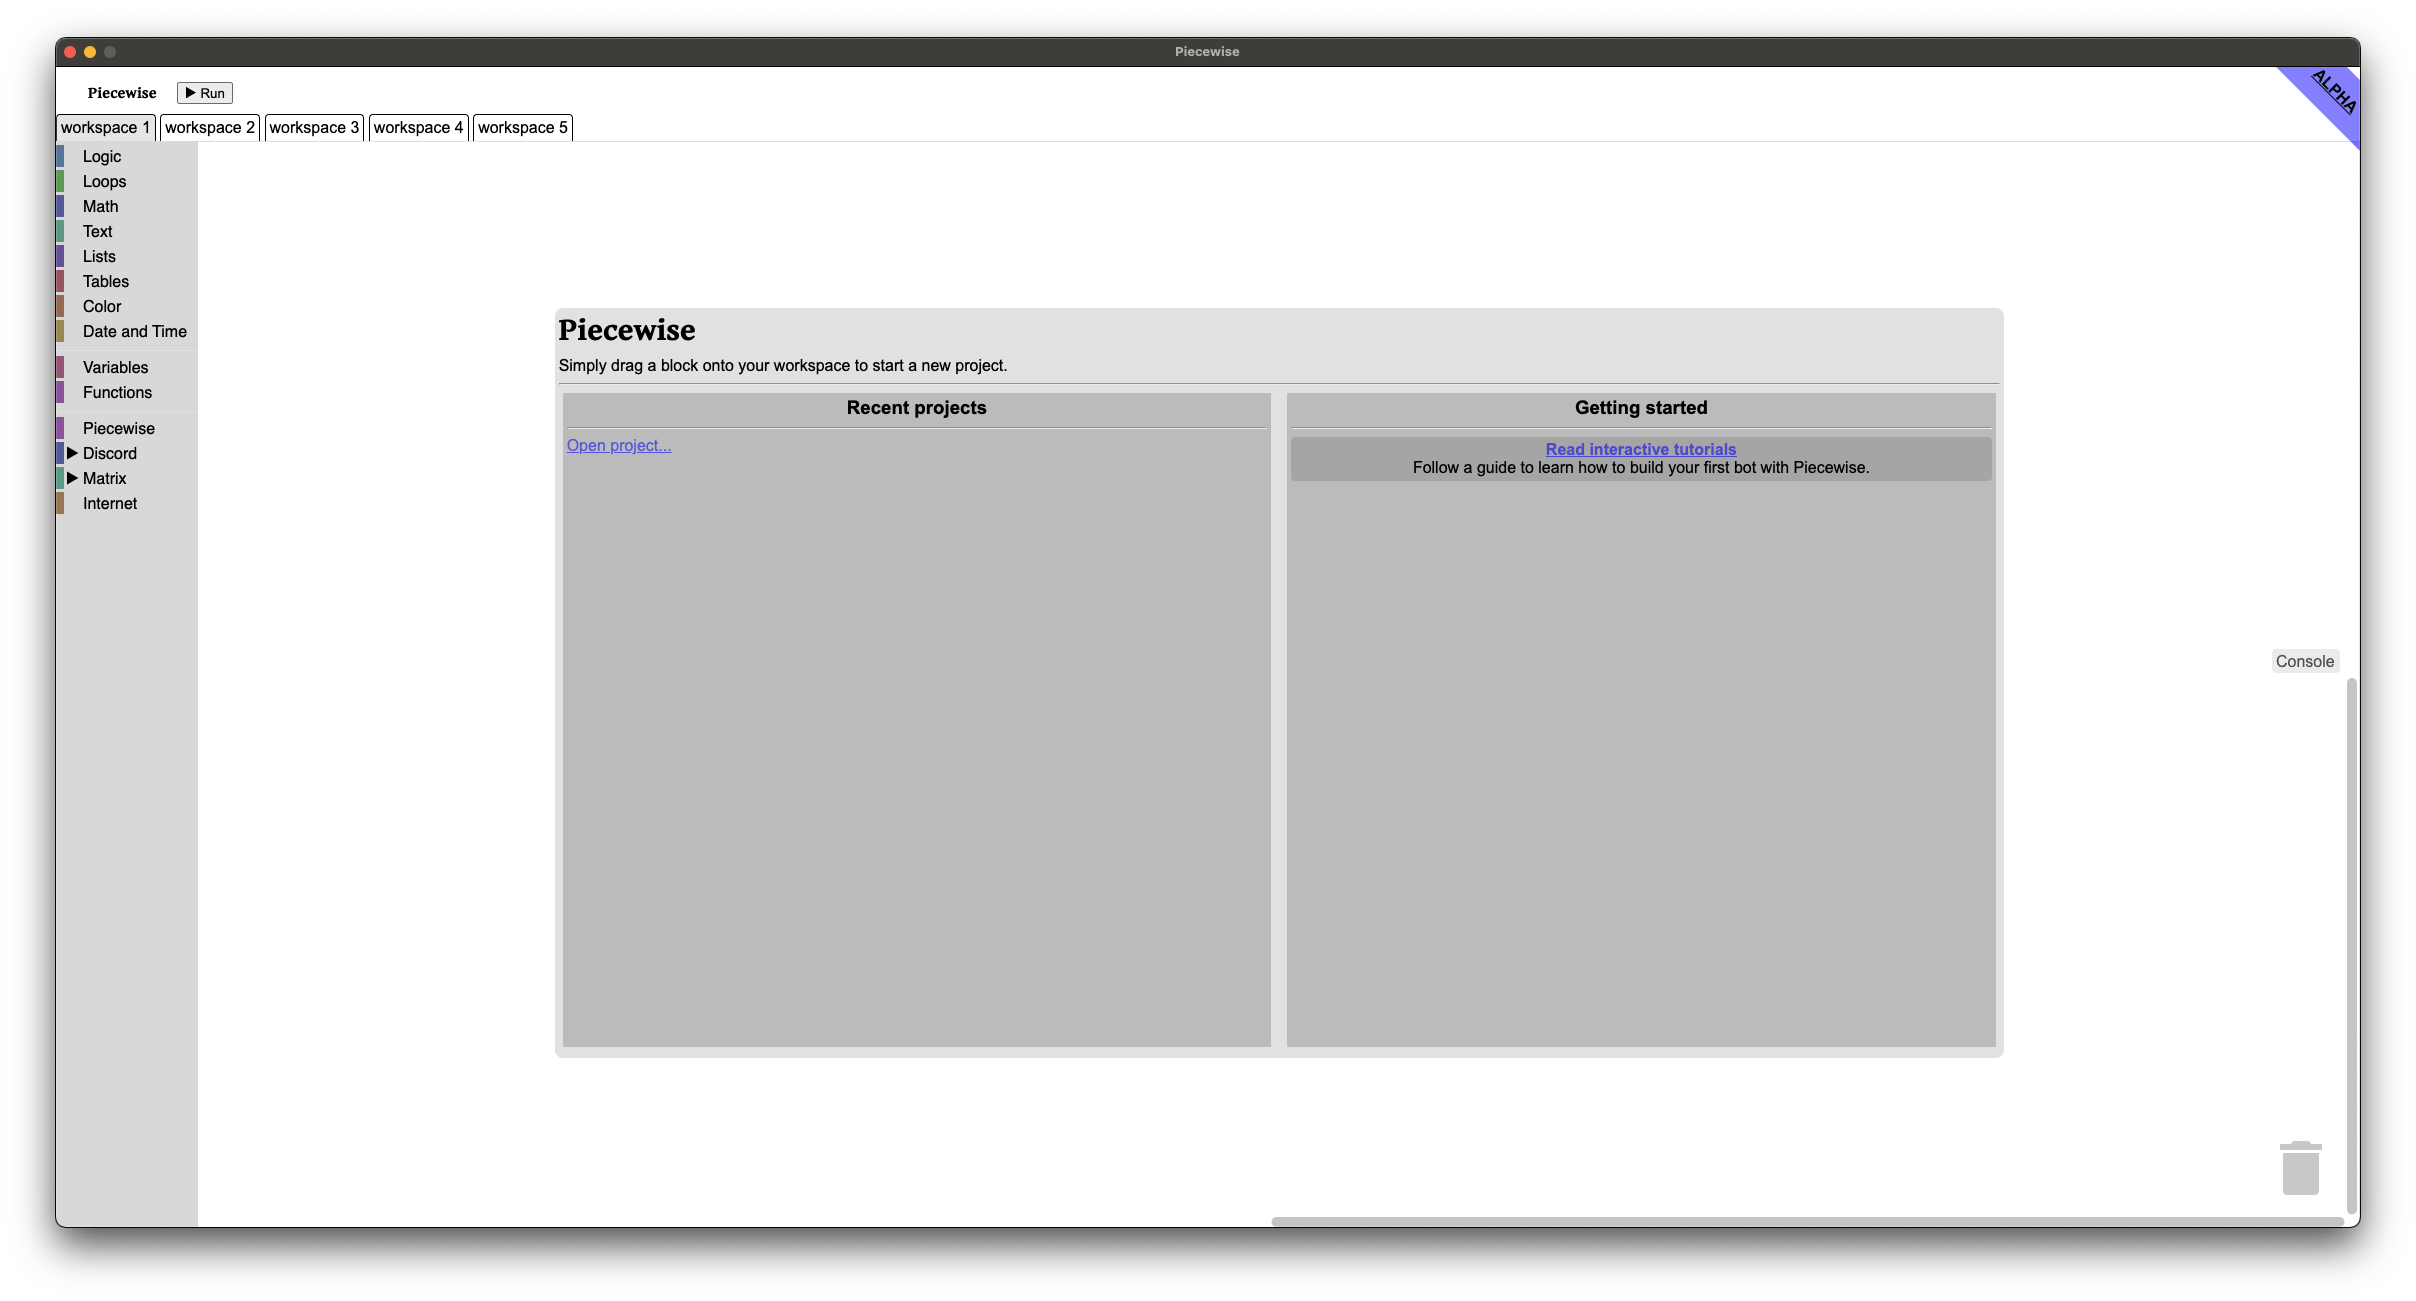
Let’s take a look at the main elements of this window:
-
Run - The run button is at the top, to the right of the “Piecewise” branding. This button executes your bot as you have built it on the canvas. This button can also be activated by pressing Ctrl-Shift-B (or ⌘⇧B, on macOS).
-
Workspaces - The tabs at the top of the window allow you to switch workspaces. Workspaces are designed to split your bot up into organized, digestible portions. Each “workspace” provides a new, blank canvas to drag and drop blocks onto. We’ll go in-depth into workspaces, including their benefits and limitations, later.
-
Toolbox - The toolbox is at the left side of the workspace, in a grayer color to separate it from the canvas. The toolbox contains all of the blocks you can use to create bots, divided into relevant categories.
-
Canvas - The canvas, to the right of the toolbox, is where you will put and assemble the blocks you have selected.
-
Welcome screen - The welcome window appears in the center of the canvas when you have created a new project, or have opened the program for the first time. From this window, you can open projects you have saved recently, or read guided tutorials for Piecewise. Dragging any block onto the canvas will hide the Welcome screen.
-
Console - The console appears to the right when you click the “Console” button, and contains important messages relating to your bot, including any errors encountered, or any text you decide to put into the console (more on this later).
-
Trash can - The trash can, at the bottom right, contains blocks you’ve removed from your current workspace. While it won’t be covered in this tutorial, you can recover blocks from the trash can at any time - as long as you have not closed the program - by clicking on it and dragging the desired blocks out on to your canvas.
The menu bar

The menu bar also contains a few options. This is located at the top of your screen on macOS, or the top of the window on Windows or Linux. Here are the options most relevant:
-
File → Save (As) - Save your work to a file so it can be opened with Piecewise later. You can save your work at any time by pressing Ctrl-S (or ⌘S, on macOS).
-
File → New - Create a new project. You’ll be asked to save your existing project, if one exists or you haven’t already. You can create a new project at any time by pressing Ctrl-N (or ⌘N, on macOS).
-
File → Open - Open a file you’ve previously saved with Piecewise. You’ll be asked to save the project you currently have open, if one exists or you haven’t already. You can open a project you’ve saved at any time by pressing Ctrl-O (or ⌘O, on macOS).
-
Edit → Cut/Copy/Paste - Cut (move), copy, and paste blocks on a canvas. Blocks can be cut, copied, and pasted between workspaces, but not to programs outside of Piecewise. You can cut by pressing Ctrl-O (or ⌘O, on macOS), copy by pressing Ctrl-C (or ⌘C, on macOS), and paste by pressing Ctrl-V (or ⌘V, on macOS).
-
Edit → Undo/Redo - Undo or redo your last action on the current canvas, e.g. moving blocks, dragging and dropping onto the canvas, etc. You can undo by pressing Ctrl-Z (or ⌘Z, on macOS) and redo by pressing Ctrl-Shift-Z (or ⌘⇧Z, on macOS).
-
Build → Run - Run your bot. This is equivalent to clicking the Build button or pressing Ctrl-Shift-B (or ⌘⇧B, on macOS).
-
Build → Export - Export your bot, so it can be run anywhere, without Piecewise. We’ll go more in-depth into exporting later.
3. Registering your Discord bot
Registering a bot account with Discord and adding it to a server is a relatively straightforward process.
First, navigate to https://discord.com/developers/applications. If prompted, sign in. Once you see the Discord developer portal, click “New Application” at the top right.

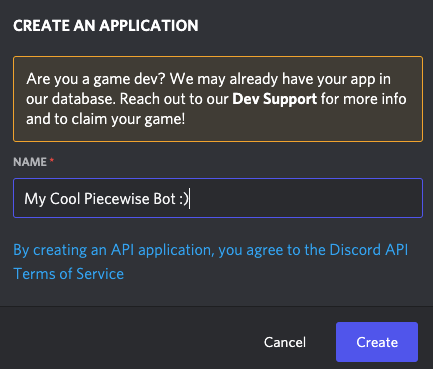
Give your new bot a name, and then click “Create.”
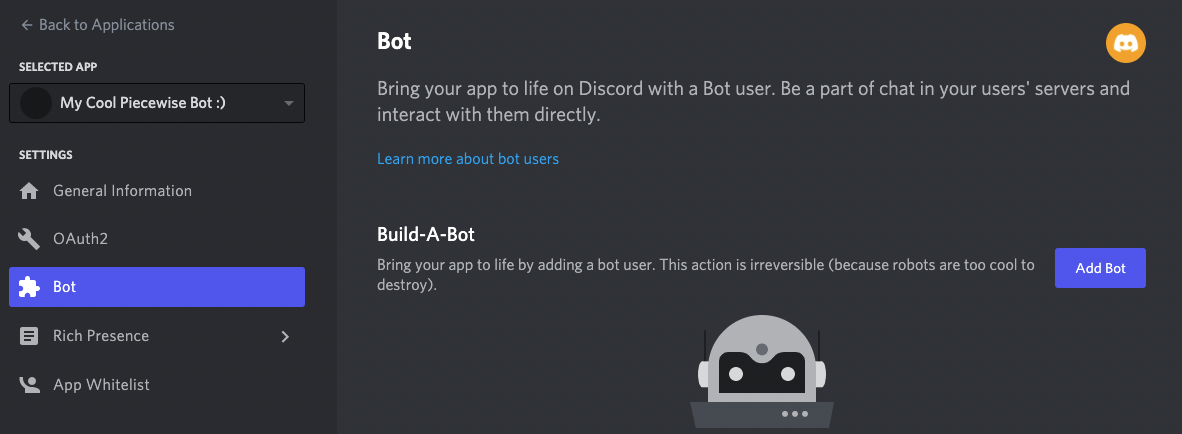
You’ll then be greeted with your application’s dashboard. Now, we’ll create a bot user. Click the “Bot” option on the left sidebar, click “Add Bot” at the top right, and, finally, “Yes, do it!”
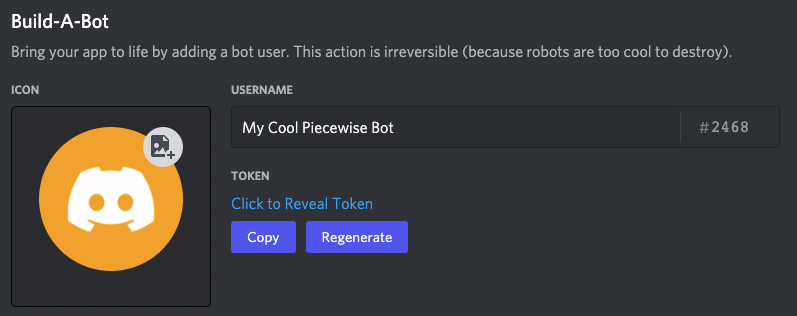
Now you’ll have a lot of options to configure on your bot. You can upload an avatar for your bot now, if you wish.
Next, you’ll need your bot token, which is used to log your bot into Discord. You can find your bot token by clicking “Copy” under the “Token” subheading under the bot’s user name.
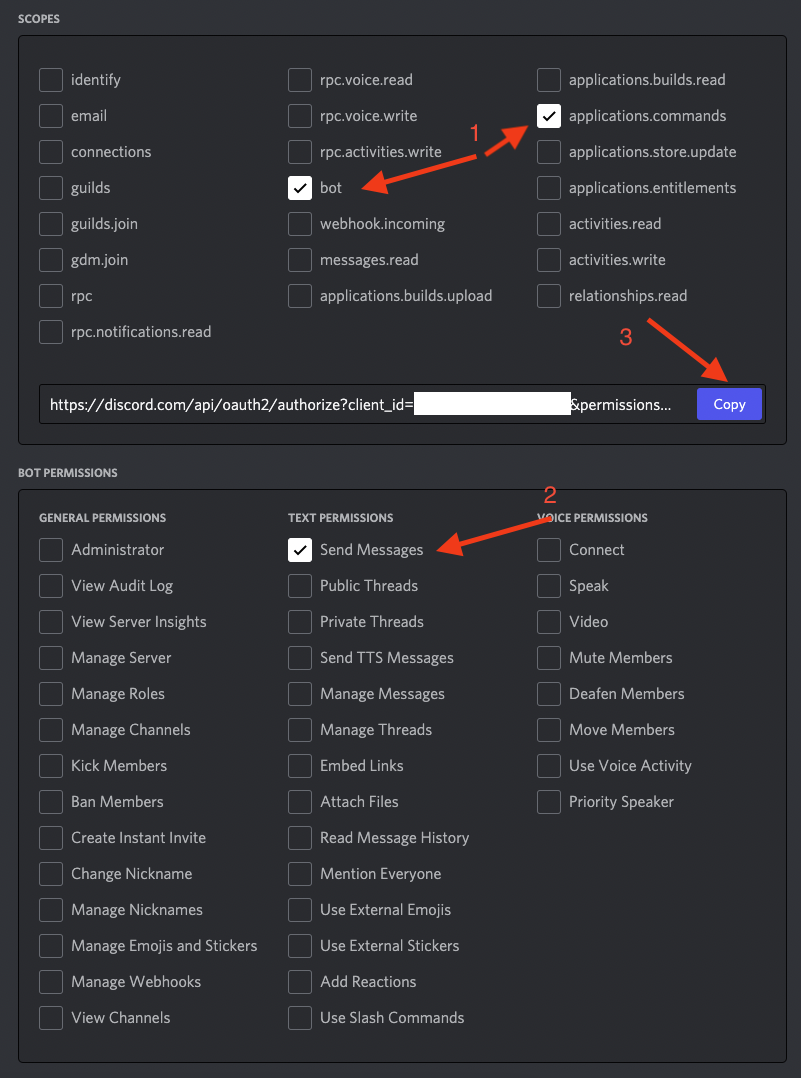
Also, you’ll need your bot authorization URL, which is used to add your bot to servers. You can find your bot authorization URL in the OAuth2 tab. Under the “OAuth2 URL Generator”, select bot and applications.commands under “Scopes” and Send Messages under “Bot Permissions.” Then, click “Copy” next to the “discord.com/api” link.
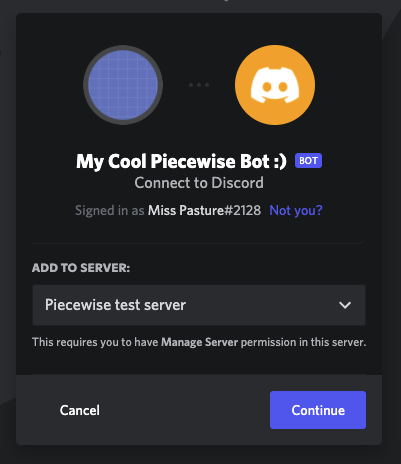
Finally, open this URL in your browser and add it to a server using the on-screen prompts. If you don’t already have a server to test in, you can create one by clicking the plus icon at the bottom right of your server list, on the left side of your screen, in the main Discord app.
4. Hello, world!
Switch back to Piecewise. We’re about to make our first bot.
Planning and Objective
It’s generally a good idea to sit down and think about what you aim for your bot to do beforehand. As computers are incredibly pedantic, it helps to frame things as specifically as possible. This will also help you assemble your bot, as For example, “The bot should say ‘hello world’” is very vague - when should the bot say “hello world”, and when?
A better example lays out the exact specifics of what you’re looking to do, and answers most questions. For our example, a great description is written as when the bot sees a message saying 'hello world' in any channel, it will respond with 'hello world'.
If you ever get lost at any part of this guide, a finished version of the bot in this guide is available from “File -> New From Template.”
Log in to Discord
First, you’ll want to set your bot to log in to Discord. Under the Discord → Configuration menu in the toolbox, drag the “log on (token)” block on to your canvas. Dragging any block on to your canvas will hide the Welcome screen.
Then, click the “with token” text area on the block, paste your bot token, and press enter.
Now, your bot is configured to log in to Discord. If you run it by using the “Run” button, it will show up as “Online” in the members list. However, we haven’t put any pieces together to make the bot do anything yet.
Listening to events
An important thing to understand about Piecewise is that it’s primarily an event-driven system. In other words, your bot will operate by reacting to certain things happening, such as a message being received, a reaction being added, or a timer elapsing. In this tutorial, we’ll be reacting to a message being received.
Under the Discord → Events tab in the toolbox is a block called “🔔 when (event) do”. Drag it to your canvas, under the “log on (token)” block. Then, select “message received” from the dropdown. The finished product should look like the image below.
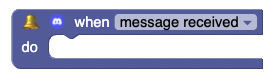
The bell icon next to the block’s name indicates that this is a block relevant to an event. Blocks related to an event usually hold references to whatever thing that just happened. This is outlined further below.
Setting up the logic
Now, we’re reacting to any message sent. But how do we react to a message sent with specific text?
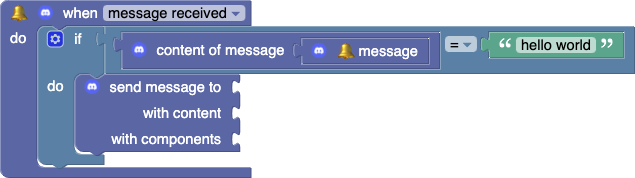
For this, we’ll use blocks in the “Logic” category. Find the “if (condition) do” block, and drag it inside the “🔔 when message received do” block. You’ll know you’ve put it together correctly when the bottom border of the top portion glows yellow and you hear a “click!” sound.
The “if (condition) do” block is the first block of this comparison. It lets the computer know that we are about to do a comparison and only do what the blocks inside say if the comparison we’re making is successful.
Next, drag the (value) (operand) (value) block from the Logic category - it will look like the below - onto your canvas. Place it to the right of the if (condition) do block. When you’ve placed it correctly, it will snap, just like in the last example. Ensure the operand is = by selecting it from the dropdown in the middle.
This is the block that actually does the comparison - it asks the computer the question “is the thing on the left equal to the thing on the right?”
Getting the message content
Our next step is to define what two things the computer should compare. Under the Discord → Messages category, find the “content of message (message)” block and place it in the white space on the left of the “(value) = (value)” block. Then, under the Discord → Events category, find the “🔔 message” block and place that inside of the “content of message (message)”. As usual, all of these blocks should “click!” when placed properly.
All of the statements we’ve placed so far read “when a message is received, if the content of the message is (…)”. Let’s break down the blocks we just placed:
- The “🔔 message” block is an event block, as discussed above. In this case, the block represents the actual message that was received by the bot in response to this event.
- The “content of message (message)” block retrieves the actual content of a message - what the user typed. We have to use this block because there are other parts of the message that we can access - but we’ll save a further explanation for later.
Extra Credit: There are actually quite a few event blocks, which represent values within an event. Values are only valid where they make sense.
Event block Description 🔔 message Represents the message that was sent, deleted, or edited. Only valid in “message” events, e.g. “message created”, “message deleted”… 🔔 user Represents the user that initiated this event, or was the target of this event. For example, this might be the user that sent the message, or the user that was kicked or banned from a server. 🔔 channel Represents the channel that this event occurred in, or was the target of this event. For example, this might be the channel that a message was sent in, or the channel that was created or deleted in a server. 🔔 server Represents the server that this event occurred in, or was the target of this event. For example, this might be the server that a message was sent in, or the server that someone joined or left. 🔔 reaction Represents the reaction that triggered this event. For example, this might be the reaction that was added or removed from a message. 🔔 emoji Represents the emoji that triggered this event. For example, this might be the reaction that was added to or removed from a message, or an emoji that was created or deleted. Using an event block outside of a context that makes sense will cause an error.
Comparing text
Now, we’re going to define the right side of the comparison - what text we want to compare the message content to.
Under the “Text” category is a “‘(text)’” block. Drag it to the right portion of the “(value) = (value)” block. Then click the empty text box, enter hello world, and press ENTER. The finished product should look like the below.
Sending the message
We now know that the message says “hello world” - so let’s send “hello world” back!
You can send messages using the “send message to (target) with content (content) with components (component)” block. It is located in Discord → Messages - drag it on to your canvas within the “if (condition) do” block.
Then, back in the Discord → Events tab, find the “🔔 message” block we used before and drag it so that it clicks next to the topmost notch on the right - the notch that defines the target.
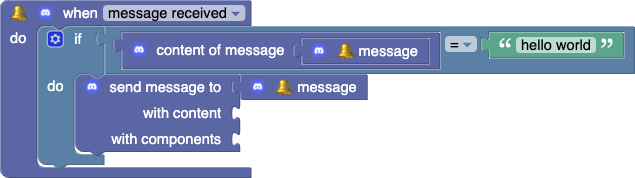
Extra Credit: When sending messages, the target can be any of a message, user, or channel.
When the target is… The message will be sent… a message as a reply to the target message a user as a DM to the target user a channel as a normal message to the target channel
Finally, drag the “‘(text)’” block - under Text - to the notch under the “🔔 message” message block, and edit it to say “hello world”.
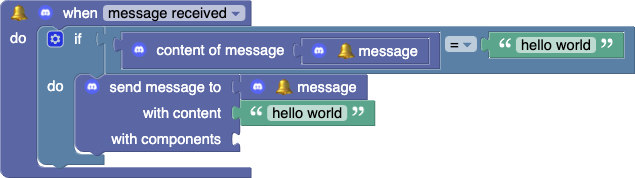
Conclusion
Now we have a working bot that does what we planned to do from the beginning - send “hello world” when the bot receives it.
Here are some extra modifications that you might want to make to your existing bot in order to learn more about and get comfortable with Piecewise.
- Change the trigger message from “hello world” to “hello planet”, and respond with “hello planet”.
- Add another trigger message of your choice, and respond with a different message. For example, you might want “hello” to return a response with “world”.
- Make the bot respond to any message that was sent with the same text, regardless of what text contains.